Android – Hello World Example
Let us start actual programming with Android Framework.
Create an Android Application
(1) The first step is to create a simple Android Application using Android studio. When you click on the Android studio icon, it will show a screen as shown below.

( 2 ) You can start your application development by calling start a new android studio project. in a new installation, frame should ask for Application name, package information, and location of the project.

(3) The next level of installation should contain selecting the activity to mobile, it specifies the default layout for Applications.

(4) At the final stage it going to be open development tool to write the application code.

Anatomy of Android Application
(5)Before you run your app, you should be aware of a few directories and files in the Android project

(1) AndroidManifest.xml
This is the manifest file that describes the fundamental characteristics of the app and defines each of its components.
(2) Java
This contains the .java source files for your project. By default, it includes a MainActivity.java source file having an activity class that runs when your app is launched using the app icon.
(3)res/drawable-hdpi
This is a directory for drawable objects that are designed for high-density screens.
(4)res/layout
This is a directory for files that define your app’s user interface.
(5)res/values
This is a directory for other various XML files that contain a collection of resources, such as strings and colours definitions.
(6)Build.gradle
This is an auto-generated file which contains compileSdkVersion, build tools version, applicationId, minSdkVersion, targetSdkVersion, versionCode, and versionName
The Main Activity File:-
The main activity code is a Java file MainActivity.java. This is the actual application file that ultimately gets converted to a Dalvik executable and runs your application.
package com.android.android_helloworldexample;

import androidx.appcompat.app.AppCompatActivity;

import android.os.Bundle;

public class MainActivity extends AppCompatActivity {

    @Override
    protected void onCreate(Bundle savedInstanceState) {
        super.onCreate(savedInstanceState);
        setContentView(R.layout.activity_main);
    }
}
The Manifest File:-
Whatever component you develop as a part of your application, you must declare all its components in a manifest.xml which resides at the root of the application project directory. This file works as an interface between Android OS and your application, so if you do not declare your component in this file, then it will not be considered by the OS. For Example…
<?xml version="1.0" encoding="utf-8"?>
<manifest xmlns:android="http://schemas.android.com/apk/res/android"
    package="com.android.android_helloworldexample">

    <application
        android:allowBackup="true"
        android:icon="@mipmap/ic_launcher"
        android:label="@string/app_name"
        android:roundIcon="@mipmap/ic_launcher_round"
        android:supportsRtl="true"
        android:theme="@style/Theme.AndroidHelloWorldExample">
        <activity android:name=".MainActivity">
            <intent-filter>
                <action android:name="android.intent.action.MAIN" />

                <category android:name="android.intent.category.LAUNCHER" />
            </intent-filter>
        </activity>
    </application>

</manifest>
The Strings File:-
The strings.xml file is located in the res/values folder and it contains all the text that your application uses. For example, the names of buttons, labels, default text, and similar types of strings go into this file. This file is responsible for its textual content. For Example.
<resources>
    <string name="app_name">Android - Hello World Example</string>
</resources>
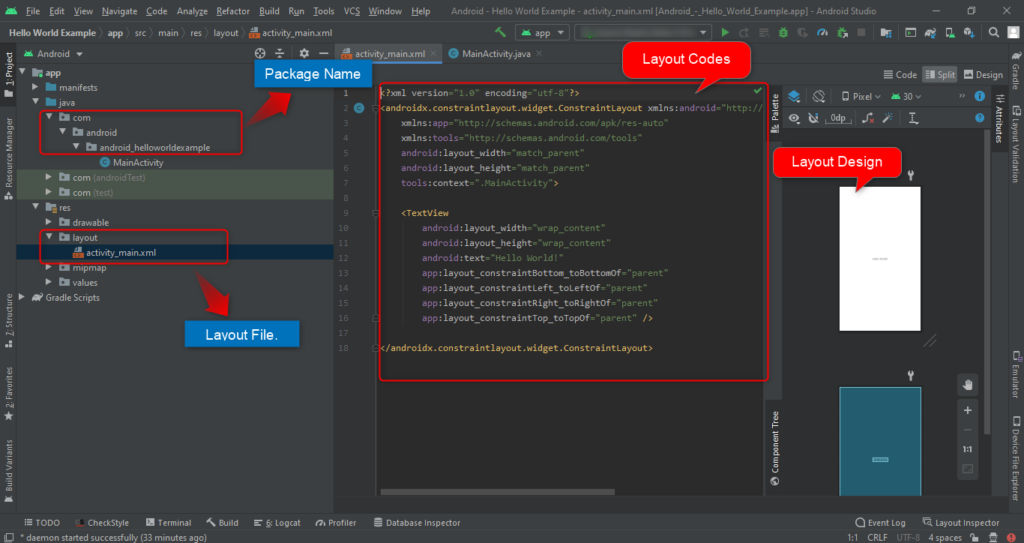
The Layout File:-
The activity_main.xml is a layout file available in the
<?xml version="1.0" encoding="utf-8"?>
<androidx.constraintlayout.widget.ConstraintLayout xmlns:android="http://schemas.android.com/apk/res/android"
    xmlns:app="http://schemas.android.com/apk/res-auto"
    xmlns:tools="http://schemas.android.com/tools"
    android:layout_width="match_parent"
    android:layout_height="match_parent"
    tools:context=".MainActivity">

    <TextView
        android:layout_width="wrap_content"
        android:layout_height="wrap_content"
        android:text="Hello World!"
        app:layout_constraintBottom_toBottomOf="parent"
        app:layout_constraintLeft_toLeftOf="parent"
        app:layout_constraintRight_toRightOf="parent"
        app:layout_constraintTop_toTopOf="parent" />

</androidx.constraintlayout.widget.ConstraintLayout>
res/layout directory, that is referenced by your application when building its interface. You will modify this file very frequently to change the layout of your application. For your “Hello World!” application.
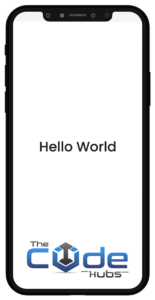
Output In My Application
Congratulations!!! you have developed your first Android Application and now just keep following the rest of the tutorial step by step to become a great Android Developer. All the very best.


