Implementation of SweetAlert2 in Angular application:
Hello Coders!, Here is a Simple and Easy step to Implementation of SweetAlart2 in your Angular Application.
Installation :
Open your Application Terminal and type a code as Below
npm install sweetalert2 @sweetalert2/ngx-sweetalert2
after Successfully Installation of the SweetAlert2 in your Application Import the below file into your app.module.ts.
import { SweetAlert2Module } from '@sweetalert2/ngx-sweetalert2';
Import Below Code in @NgModule:
imports: [SweetAlert2Module.forRoot()],
It’s Done, Feel free to use SweetAlert2 in your Entire Application.
Usage In your Component:
Let’s Import the below code in your Component to use SweetAlert.
import Swal from 'sweetalert2';
Here we will take one simple Example to Understand More better way,
Now We have a List of Records and We going to Delete one of Them and see how SweetAlert2 Actually works.
deleteRestaurent(restaurentId: number) {
    Swal.fire({
      title: 'warning!',
      text: "You won't be able to revert this!",
      icon: 'warning',
      cancelButtonText: 'Cancel',
      showCancelButton: true,
      confirmButtonText: 'Yes, delete it!'
    }).then((result) => {
      if (result.value) {
        this.restaurentService.delete(restaurentId).subscribe(restaurentdata => {
          this.apiResponse = restaurentdata.IsSuccess;
          if (this.apiResponse == true)
          {
            this.notifyService.showSuccess(restaurentdata.Message)
            this.readRestaurent();
            window.location.reload()
          }
          else
          {
            Swal.fire({
              title: 'Error!',
              text: restaurentdata.Message,
              icon: 'error',
              confirmButtonText: 'Ok'
            })
          }
        });
      }
    })
  }
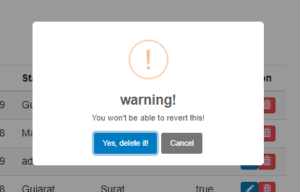
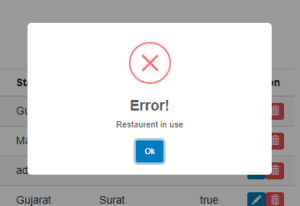
let’s have a look at some Alert Images
If we try to delete Record:

If we get some error while Deleting Records:

The Above code will Delete the Restaurant Records, if and only if the user Accept the warning and Proceed, but if we have some error while Processing we will have Error Alert too.
This is a simple and easy process of the SweetAlert2, Hope you get it and it helps you in your Development, and stay tuned for more updates.


