In this article, we will learn about installing all package of Vue.js and setup new Vue.js application.
Roadmap for setting up Vue.js
- Install the latest version of Node.js
- Installing @vue/cli
- Creating new Vue project
- Taking a look at Vue user interface.
- Folder structure for Vue.js project
Install the latest version of Node.js
- You can install latest version from https://nodejs.org/en/
- After successfully installation of Node.js open Command Prompt and check your Node.js latest version.
- In Command Prompt write the following command for checking the latest version of Node.js
- Command : $node -v.
![]()
Installing @vue/cli
- In order to use the @vue/cli, you’ll need to have Node.js version 8 or above installed (8.10.0+ is recommended).
- write the following command for installing Vue.js user interface/application
- Command : $npm install -g @vue/cli
![]()
- Write the command for getting latest version of @vue/cli – Command : $npm -v
- Once it is installed, you’ll have access to the
vuebinary in your command line. We’ll use this to create our project.
Creating new Vue project
- There are two way for creating Vue project. With the newer Vue UI, or directly from the command line, which we’ll do now with:
- In CMD write the command for creating Vue project
- Command Syntax : vue create projectname
![]()
- Remember project name should in lowercase letter.
- By pressing enter below dialogue will prompt in CMD.

- Select Default option from other option and By pressing the enter you will get below message in CMD

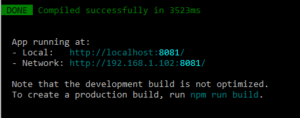
- After Type npm run serve in CMD and you will get following output in CMD

- Open your browser and write your Local URL
- Finally You can see the Vue user interface
Taking a look at Vue user interface.

- Write the following command for open your project in visual studio code
- Command: code <space> dot
![]()
Folder structure for Vue.js project


