In this blog, we are going to integrate Razorpay in Asp.Net MVC using SDK.
For Using Razorpay in our .Net Application we are going to use its NuGet Package.
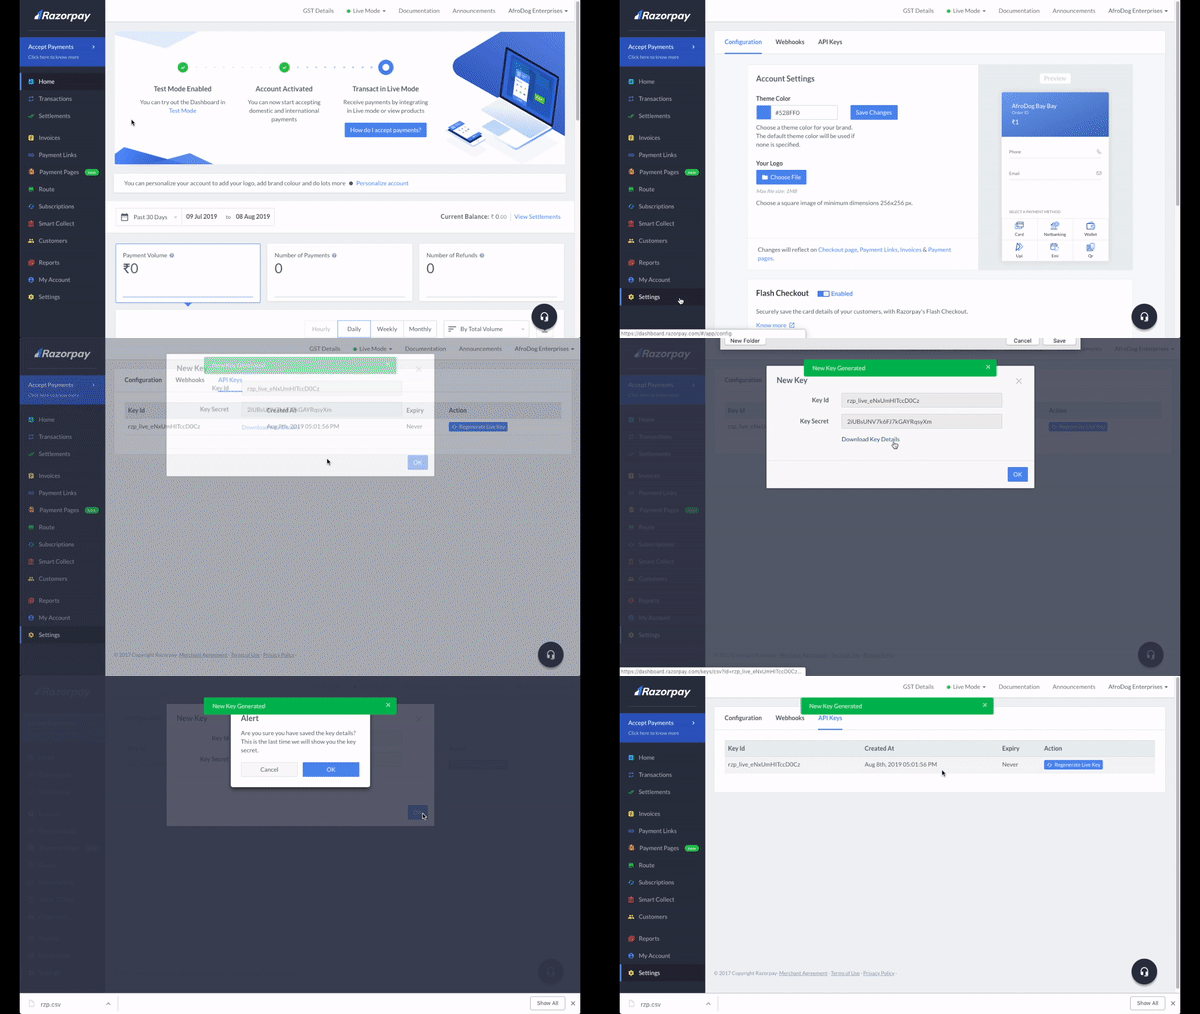
but first, we need to Generate API Key from Razorpay Portal. please find the following step for it.
- Log into Dashboard with your account.
- First, you need to select the mode (Test or Live) for which you want to generate the API key.
- After login Navigate to Settings > API Keys > Generate Key to generate an API key for the selected mode.

once you get API keys store it somewhere so you can use it later.
Create/Open .Net MVC application.
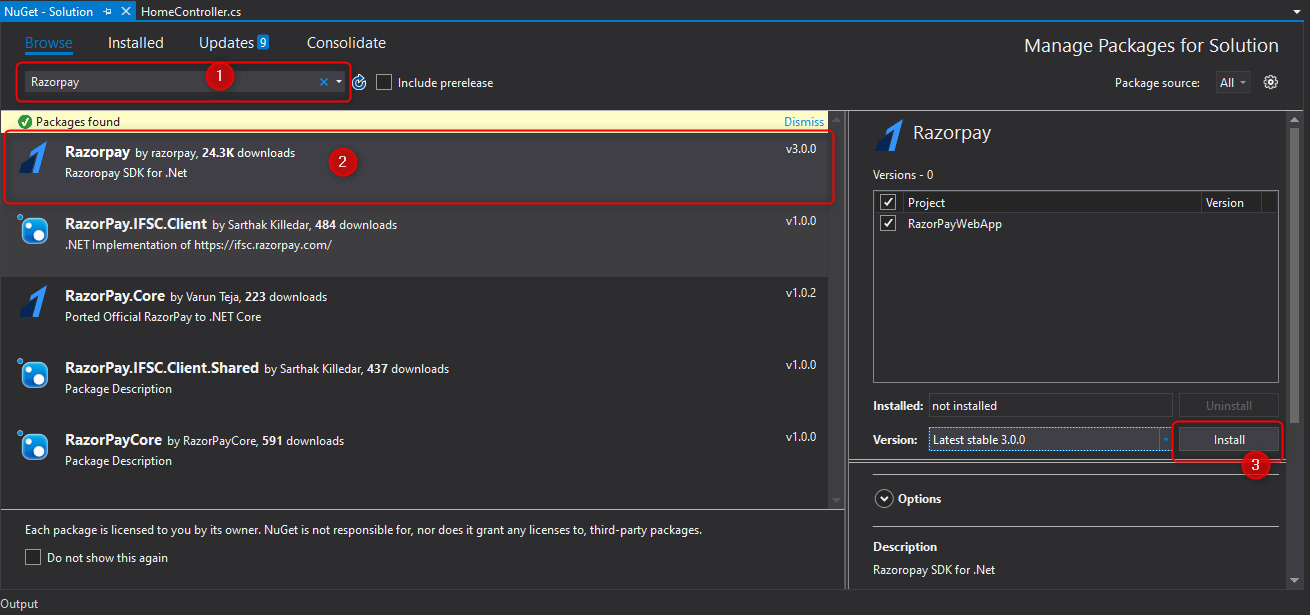
open NuGet Package Manager and search for Razorpay and install it in your application. please review the following image.

after Successfully adding/installing Razorpay Package in .Net MVC Application.
go to HomeController and add import following package into the controller.
using Razorpay.Api;
now we need to Initialize the RazorpayClient object with parameter as Generated Keys. here we are Initializing it globally in HomeController Controller at the top. you can Initialize it in the method also, as per your preference/requirement.
RazorpayClient client = new RazorpayClient("YOUR-KEY", "YOUR-SECRET");
That’s it. you can use this Initialized variable for any kind of Razorpay call.
you may also like some article about Razorpay as below,
How To Send Payment link To Customer Using Razorpay In Asp.Net MVC


