Introduction
NuGet packages are pre-defined pieces of code that are reusable for other developers. You can add a NuGet package to your project and use it’s functionality wherever you want in your project. We can also say that NuGet behaves like a platform, where developers can create and share code with the world. It contains code that’s compiled as DLL which is nearly impossible to decrypt.
Prerequisites
- Visual Studio
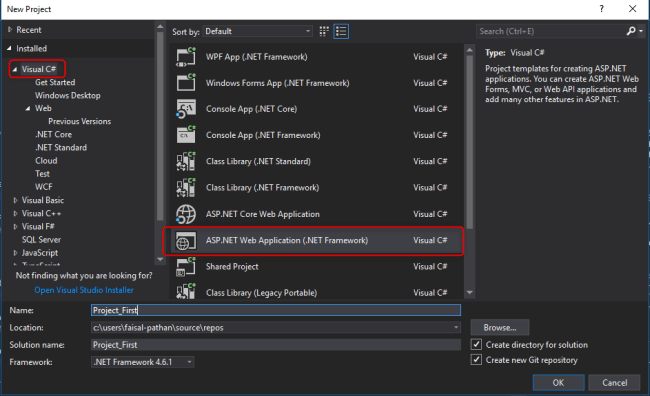
Create a Project
- We can install NuGet packages in any .NET project which supports the same target framework as our project.
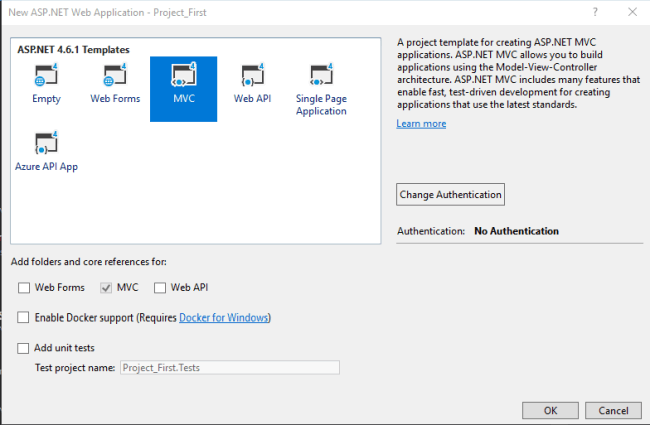
- For this demo, I’m using a standard MVC Project.


Open the NuGet Package Manager
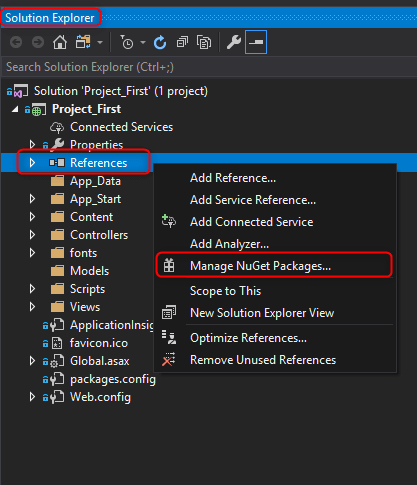
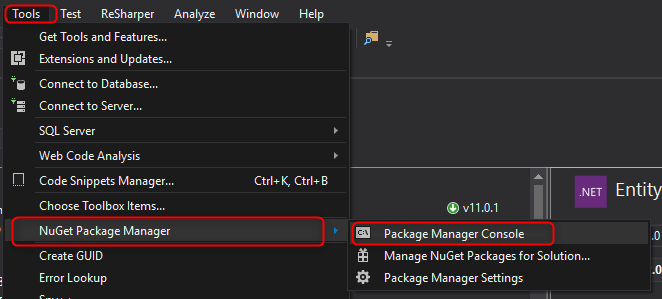
Now, there are two options for opening the Nuget Package Manager window.
- Select Tools > NuGet Package Manager > Manage Nuget Packages for Solution.

2. Go to your Solution Explorer, right-click on References, and choose Manage NuGet Packages.

Step 3: Search and Install Your Required NuGet Package

- In this window, you can search for, install, uninstall and update any Nuget Package. You can also see a full list of your installed NuGet packages.
- Once you click on the Install button and click on ‘I Agree’ in the permissions pop-up window, then that particular package will be installed/added to your project.
- Here, I am installing the EntityFramwork Nuget Package.
Once the package is installed successfully, this message will be displayed.

Here, You can see your installed project. Go to Solution Explorer > Reference, and expand it.

Now you can access that package/code from your project.
Note: You can also install NuGet packages for multiple projects at the same time and in the same place.
Installing NuGet Using the Package Manager Console
Select Tools > NuGet Package Manager > Package Manager Console

It will open the console at the bottom of the window.
Select Your Project and Execute the Below Command to Install the Package

If your command is valid, then the package will be installed in your project.


