
Introduction
Microsoft freshly announced the release of the latest .NET web framework namely Blazor. Blazor is a free and open-source Web framework to develop Web apps using C# that run in a Web browser. In this article, we will learn Blazor and setup the Blazor development environment in our computer and execute our first program in ASP.NET Core using Blazor and Visual Studio 2019.
What is Blazor?
Blazor is a free and open-source Web framework to develop SPA(single page application) client-side Web apps using C# and Razor syntax which runs in a browser with help of WebAssembly.
Prerequisites
- Install the .NET Core 2.1 SDK from here.
- Install the latest preview of Visual Studio 2017 (15.7) from here or Visual Studio 2019 from here.
- Install ASP.NET Core Blazor Language Services extension from here.
Getting Started with Blazor
Here, I’ll use Visual Studio 2019. To get started with Blazor we must need to install Prerequisites. After we’ve installed all the prerequisites we are ready to create our first project with Blazor.
Create a new project
Open Visual Studio 2019, and select “Create a new project”.

Select “Blazor App”.

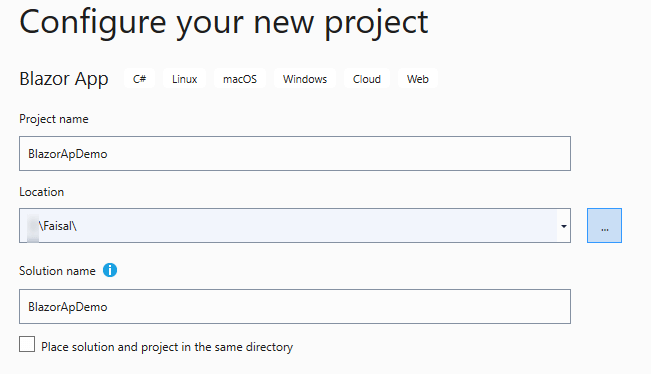
Click on the “Next” button and set the proper Name and path for the project.
Click on the “Create” button and select the “Blazor Server App” to create a project.

Now, Project is created and we can see below the project directory structure.
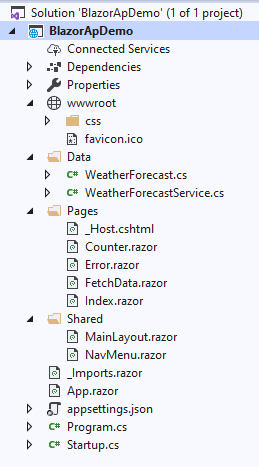
There is a “wwwroot” folder contains the CSS folder and favicon files, “Data” folder which contains a default model class and service class. “Pages” folder contains the razor component files. “Shared” folder contains “MainLayout” and “NavMenu” shared components files and .NET Core files namely appsettings.json, Program.cs and Startup.cs files.
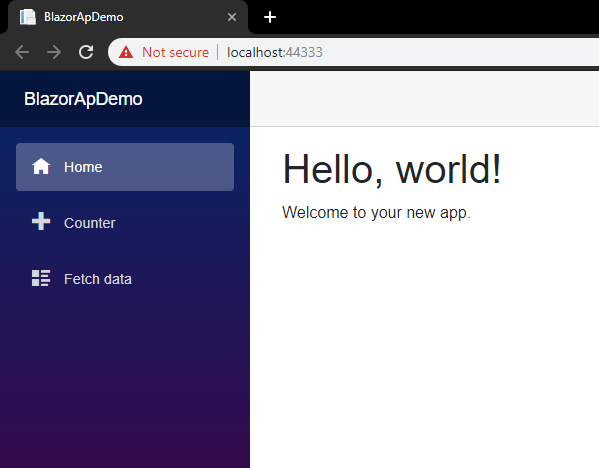
Now, Press “F5” to run the project, we can see below the screen as output.
Now, let’s create a simple age calculator with Blazor. Create a razor component “AgeCalc” under the “Pages” folder.

Copy below code and paste in AgeCalc.razor file.
@page "/ageCalc"

<h3>Age Calculator</h3>

<p>
    Select BirthDate : <input type="date" id="dateOfBirth" @bind="DOB" />
</p>

<button class="btn btn-primary" @onclick="calculateAge">Calculate</button>

<p>Your age is : @age</p>

@code {

    DateTime DOB { get; set; } = DateTime.Now;

    int age = 0;

    void calculateAge()
    {
        age = DateTime.Now.Year - DOB.Year;
        if (DateTime.Now.DayOfYear < DOB.DayOfYear)
            age = age - 1;
    }
}
Now, we need to add a menu to access that page, to add menu copy below code and paste inside NavMenu.razor file.
<li class="nav-item px-3">
    <NavLink class="nav-link" href="ageCalc">
          <span class="oi oi-list-rich" aria-hidden="true"></span> Age Calculator
    </NavLink>
</li>
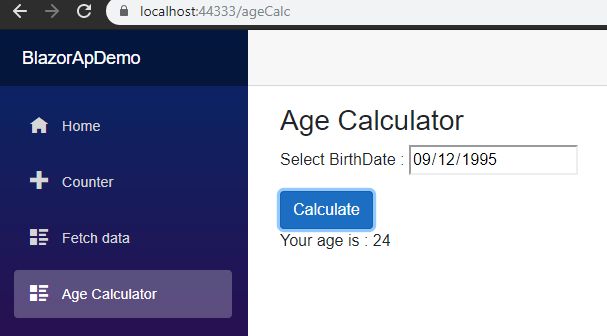
The full-page looks like this.
<div class="top-row pl-4 navbar navbar-dark">
    <a class="navbar-brand" href="">BlazorApDemo</a>
    <button class="navbar-toggler" @onclick="ToggleNavMenu">
        <span class="navbar-toggler-icon"></span>
    </button>
</div>

<div class="@NavMenuCssClass" @onclick="ToggleNavMenu">
    <ul class="nav flex-column">
        <li class="nav-item px-3">
            <NavLink class="nav-link" href="" Match="NavLinkMatch.All">
                <span class="oi oi-home" aria-hidden="true"></span> Home
            </NavLink>
        </li>
        <li class="nav-item px-3">
            <NavLink class="nav-link" href="counter">
                <span class="oi oi-plus" aria-hidden="true"></span> Counter
            </NavLink>
        </li>
        <li class="nav-item px-3">
            <NavLink class="nav-link" href="fetchdata">
                <span class="oi oi-list-rich" aria-hidden="true"></span> Fetch data
            </NavLink>
        </li>
        <li class="nav-item px-3">
            <NavLink class="nav-link" href="ageCalc">
                <span class="oi oi-list-rich" aria-hidden="true"></span> Age Calculator
            </NavLink>
        </li>
    </ul>
</div>

@code {
    bool collapseNavMenu = true;

    string NavMenuCssClass => collapseNavMenu ? "collapse" : null;

    void ToggleNavMenu()
    {
        collapseNavMenu = !collapseNavMenu;
    }
}
Output
If you want to learn CRUD operation in Blazor please visit here.
Hi,
Just getting into ASP.NET, razor and all. Where do I find the oi oi-xxxxxx class details, I can not seem to find a list anywhere?
Thanks in advance
Your articles covering Blazor are excellent. I would love to see a tutorial covering Master Detail CRUD with SQL Server and of course Blazor. Would this be possible?
Thanks
Jim
It’s already there please visit following link.
http://staging.thecodehubs.com/crud-using-blazor-entity-framework-core-and-dapper/
Of course, what a great blog and illuminating posts, I definitely will bookmark your site.Have an awsome day!
Thanks for the feedback!
hi!,I like your writing very much! share we communicate more about your post on AOL? I need an expert on this area to solve my problem. May be that’s you! Looking forward to see you.
please ping me on personal mail, If I can help you, definitely I’ll
Great Article
Thanks for the feedback!