In this article, we will learn about how to get the Connection String from SQL Server using Visual Studio.
Step 1:
Firstly open your project with Visual Studio in which you want to use your Connection String.
Step 2:
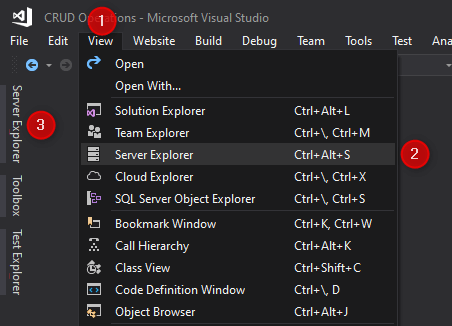
Now, Click on View menu -> Server Explorer to access a database server either use Ctrl+Alt+S.

Step 3:
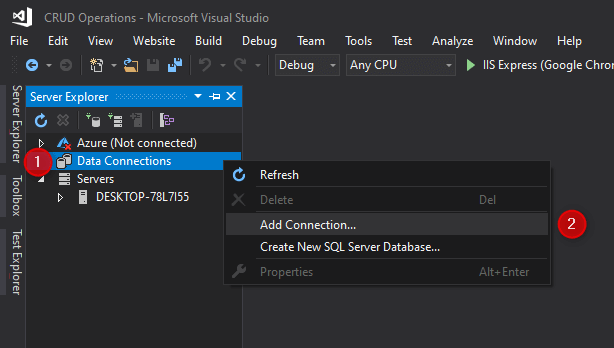
Now, right-click on Data Connections -> Add Connection.

Step 4:
Now simply choose (or enter) the server name, enter server authentication details (if required), choose the database name, and click Test Connection then click OK.

Step 5:
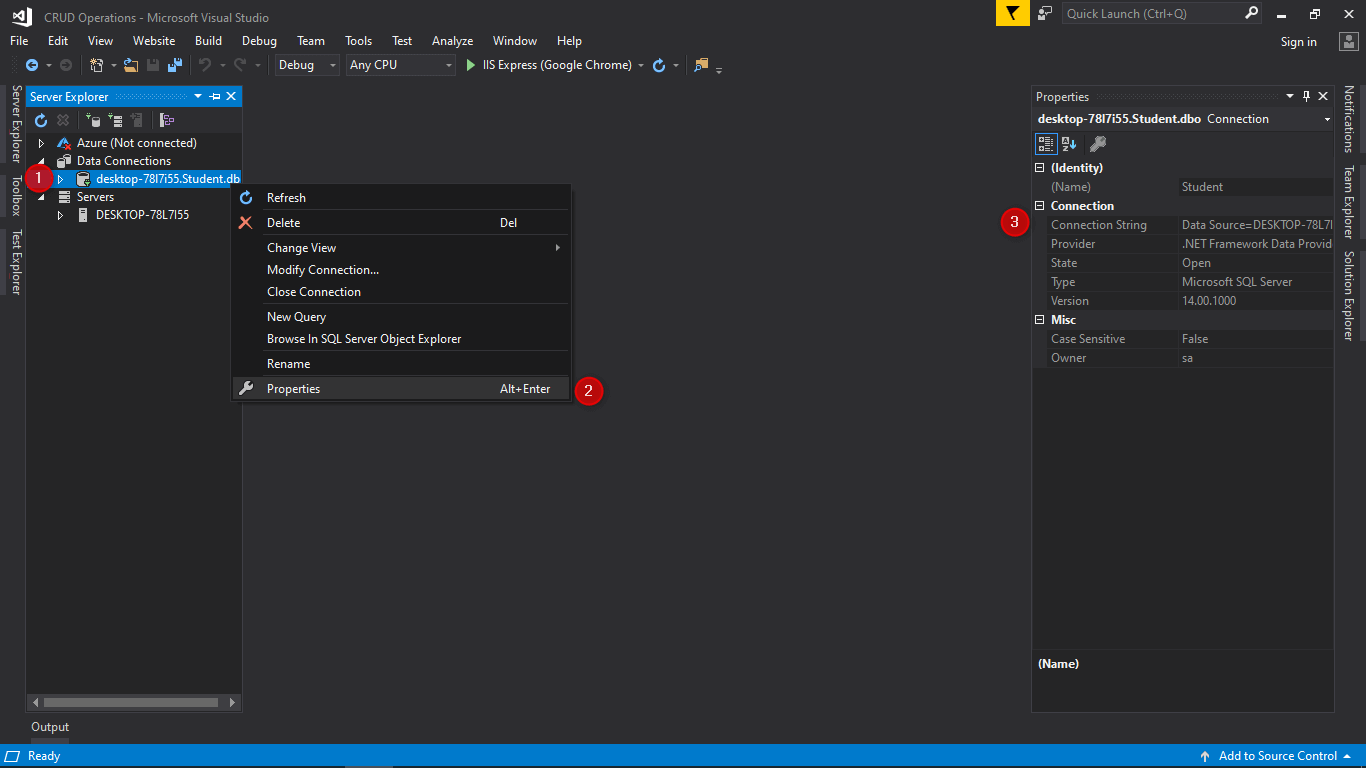
The connection will be entered into the Server Explorer window. Now, choose and right-click on Connection -> Properties (F4 or Alt+Enter) then copy connection string from Properties window -> Connection -> Connection String.

Step 6:
Now, open Web.config file from Solution Explorer window and then paste connection string as shown below.

<connectionStrings>
    <add name="myConnectionString" connectionString="Data Source=DESKTOP-78L7I55;Initial Catalog=Student;User ID=sa;Password=***********" />
</connectionStrings>
Step 7:
Here, we must have to change the password attribute (‘***********’) with our server password.
Also, check How To Create User In SQL


Well I really liked reading it. This information provided by you is very helpful for good planning.
Thanks 🙂