Hello Readers!, Today we are going to understand and Learn simple and basic Angular Animation. we will see all the step one by one and we will implement in our Application.
Let’s Begin:
The main Angular modules for animations are @angular/animations and @angular/platform-browser. When you create a new project using the CLI, these dependencies are automatically added to your project.
Step 1: Enabling Animation Module in app.module.ts
import { BrowserAnimationsModule } from '@angular/platform-browser/animations';
imports: [ BrowserModule, FormsModule, BrowserAnimationsModule ],
Step 2: Import Animation Function in your Component
import { trigger, state, style, animate, transition } from '@angular/animations';
Step: 3 Angular Animation Property
Here, we will add animation property to perform an animation.
animations: [
    trigger('changeState', [
      state('state1', style({
          backgroundColor: 'green',
          transform: 'scale(0.5)'
      })),
      state('state2', style({
        backgroundColor: 'red',
        transform: 'scale(1.5)'
      })),
      transition('state2=>state1', animate('2000ms')),
      transition('state1=>state2', animate('2000ms'))
    ])
  ]
look at the “animation.component.ts” like below.
import { interval } from 'rxjs'
import { Component, OnInit } from '@angular/core';
import { trigger, state, style, animate, transition } from '@angular/animations';


@Component({
  selector: 'app-animation',
  templateUrl: './animation.component.html',
  styleUrls: ['./animation.component.css'],
  animations: [
    trigger('changeState', [
      state('state1', style({
          backgroundColor: 'green',
          transform: 'scale(0.5)'
      })),
      state('state2', style({
        backgroundColor: 'red',
        transform: 'scale(1.5)'
      })),
      transition('state2=>state1', animate('2000ms')),
      transition('state1=>state2', animate('2000ms'))
    ])
  ]
})
export class AnimationComponent implements OnInit {

  currentState: string;

  constructor() { }

  ngOnInit() {
    this.currentState = "state1";
  }

  changeState() {
    this.currentState = "state2";
  }

  endState() {
      console.log('End state executed!');
      this.currentState = "state1";
  }

}
and our HTML page “animation.component.html” will look like below.
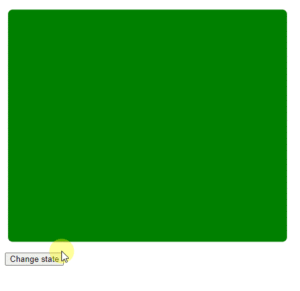
<div [@changeState]="currentState"
     (@changeState.done)="endState()"
     class="myblock mx-auto" >
</div>

<button (click)="changeState()">
  Change state
</button>
and for the Styles, we will use the below code.
.myblock {
    background-color: green;
    width: 300px;
    height: 250px;
    border-radius: 5px;
    margin: 5rem;
}
Step 4: Enjoy the Result.
Now all the property and functionality are set and up to date, now just run the code and see the final result of Angular Animation.